As a professional photographer, you will capture a variety of shots. Portraits, landscapes, group photography, among others, all have their challenges. Some might say that portrait photography,compared to group photography, is easy. It can feel daunting to capture a group rather than a single portrait, but here are a few tips and tricks to set you up for success!
Knowledge of some small details will not only make you confident in taking these but will also help you to be creative with group photos.
Wondering how to take stellar group photos? Look no further! This blog will help you master group photography. Also, we’ll list out some easy-to-take group photo shots at the end!
Group Photography 101: Things to Know and Do
1. Keep your Tools Close
Before we get into other tips, let’s take a moment to talk about the prep before a photo assignment. Pack your tripod, flash diffuser, and lenses for your photo assignment. Even if you’re sure that the venue is small, you never know if you’d be shooting outdoors or indoors. Always be prepared.
2. Wide-Angle Lens is a Necessity for Group Photos
Although a regular lens would work well, a wide-angle lens will help you capture more details in a large group. It is easier to fit everyone in the same frame with a wide-angle lens. With a regular lens, you would have to place the tripod and camera far away from the group. But with a wide-angle lens, you don’t have to worry about it. Additionally, this will help you capture every person’s face in the group.
3. Location Scouting is Important
One of the most important facets of photography is the location. Be it indoors or outdoors, the surroundings will play a huge role in your photos. Be sure to find a spot with good lighting and easy-to-use elements in the background. When it comes to group photos, open spaces in the background can mar the photo’s beauty, so try to avoid them!
For example, instead of attempting to catch the horizon in the back of the group photo, look for a spot with minimal distractions. With so many faces and bodies in a photo, leveling the composition with a clean background creates a balanced image. Always make it a point to keep the focus on the group and not the details.
With that said, even though we advise minimal distractions, your photo needs thoughtful elements as well. The elements, bridal bouquets for example, of the surrounding matter provide context for the photos, making them a vital addition. Just remember that the “group” should take up more space in the photo than the elements or surroundings.
4. Multiple Shots Go a Long Way
Multiple shots of the group will help you choose the right one. When you’re taking a photo of the group, you may feel that the photo is perfect. But when you go over your photos to send them over to your clients, you may find some shadows, different expressions, or red-eye, to name a few. To avoid sending over a photo you’re not happy with, make it a point to take multiple shots. This will help you find the perfect group shot!
5. No Long Posing Times
When taking group photos, you should reduce the posing time. Long posing times could make the group uncomfortable. Speed is the key to keeping your group happy and engaged. If you feel that your group is becoming antsy, try to break the ice. But most importantly, have a plan before you start taking photos. From the get-go know where you want your group positioned, and who stands next to whom.
6. Don’t Forget the Close-Up Shots
Group photos don’t need to be shot from a distance. In fact, getting close-up shots of the group can make the photos look clearer, capturing the details and reducing noise from background elements.
While you’re taking a close-up group shot, remember to check if every face is showing. Before you start clicking, you can call out and tell them “if you can’t see me, I can’t see you.” This will help them to figure out how to position themselves.
7. Timing is Everything
So when should you actually take those group photos? If you’re at a gathering or o wedding photo shoot assignment, the best time to take photos would be when there’s a pause in the proceedings. Last-minute photo shoots sound like a good idea, but you need to understand your subjects. By the end of the wedding, they would all be tired and it would be hard to get everyone together at short notice. The best time would be right before the reception begins. And of course utilizing golden hour for any type of photo shoot, is always recommended!
8. Don’t Be Afraid to Take Control
Taking a group photo can be intimidating. Corralling large groups of people for a photo quickly becomes nerve wracking! However, don’t be afraid to call the shots, and don’t be afraid to let them know that you’re there. Be level-headed, easy-going, natural, and in command of the situation.. Don’t be afraid to help your subjects. A little nudge goes a long way.
Photo Poses that are Just Right for Group Photos
Apart from the tips to take group photos, you should also review the best poses for these photos. Obviously, a standard pose, where everyone stands in a line, works fine. But why not challenge yourself? If you’re wanting to expand your repertoire and try out new poses, here are our suggestions:
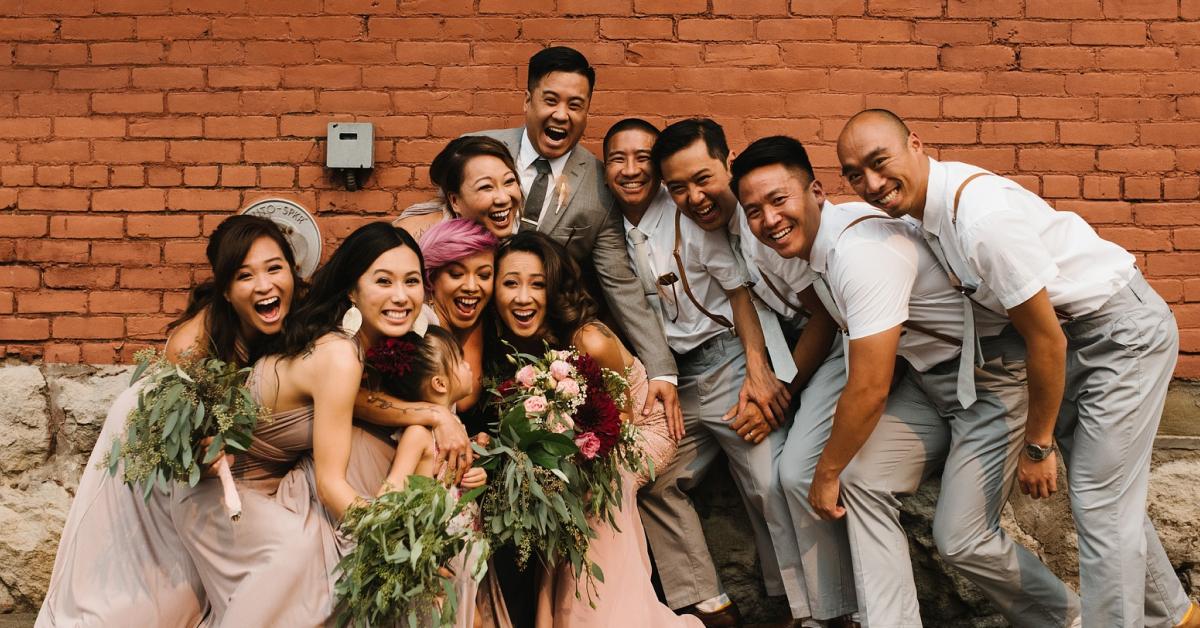
- If you’re taking group photos at a wedding, then ensure that the couple is the primary focus of the group photo. Whether they’re with their bridal party or other guests, keep them front and center. It’s a good rule of thumb to keep the subject of your photos the focal point whenever you’re at a shoot!
- When you’re taking group photos, make sure that you don’t take a group photo that is too deep. Too much distance between the group members will throw your photo’s composition off. If you have to take a group photo with people standing in a row at the front, and another row in the back, then try to keep the distance between the two rows as small as possible.
- Don’t be afraid to take “organic” photos. Follow each moment as they unfold at the event. Your subjects may not be posed, but you could capture something incredible.
- A quick tip is to ask your group to lift their chins. This will help you capture their faces and avoid double chins.
- Stairways nearby? Put them to good use and pose your group either sitting or standing on the steps.
- If you’re taking photos of a smaller group, you can have the primary subject stand in the center and have the other members of the group spill out from the back. This works the best for children and siblings.
- For a photo with just the family, you can stagger the levels. You should try to pose them in such a manner that everyone’s eye levels are different. This type of family photo pose makes for an engaging photo.
- If you’re taking a family photo with fewer people from the family, try creating triangles to keep your photos balanced. You can create triangles for larger groups as well. Start by creating a triangle in the center and then spread your group accordingly.
- You can use the “M” pose for a family of five. When you’re taking photos of the family, have them positioned in a way that if you draw an imaginary line, you’d be able to get an “M” by drawing a line from every person’s eye level.
- You can also try using the “wagon-wheel” method, placing the youngest or shortest is in the center and spreading everyone else around them.
When you’re taking group photos, always remember to read the room. Pay attention to the group’s moods. The most basic rule of thumb is to ensure that everybody is comfortable, and your group photo session will be a breeze.