Being a photographer, you know that every photograph has light and shadows. However, when the shadows become an important element or even the focal point of your professional shots, then it is called shadow photography. These days shadow photography has become immensely popular. This unique style of photography is known for its capability to transform a plain photograph into something extraordinary offering great dramatic effects. Shadows can serve as a tool to improve texture, balance, and contrast with just a very little effort.
If you are unfamiliar with how shadow photography works, then you are in for a treat! Let us unveil the magic behind professional shadow photography. This blog is dedicated to all professional photographers interested in shadow photography and wants to excel in their skills. You’ll learn the basics of shadow photography- how shadow photography differs from silhouettes, how it can elevate a normal professional portrait, and certain tips every photographer should remember during a professional shadow photography session. So, get ready to learn how to use light and shadow in photography to create powerful and mesmerizing images.
Don’t Wait For Golden Hour
Golden Hour is every professional photographer’s favorite hour to shoot. Golden hour refers to the short period when the sun is low on the horizon and casts a “golden glow” that offers great photography opportunities. However, the term ‘golden hour’ is deceiving as it typically occurs about 20 minutes (not an hour) after sunrise or before sunset.
Despite the time limitation, do not hesitate at sunrise or sunset if you want endless dramatic, professional shadow photos. Due to the low position of the sun on the horizon, the light creates long shadows that will look more prominent in all your captured photographs.
One of the advantages of “golden hour” is that it offers the perfect opportunity to capture silhouettes. When the sun is directly behind your subject, it creates a backlighting effect, instantly adding a dramatic effect to the photos. Consequently, the contrast produced by backlighting eliminates the details in your subject and causes it to look black.
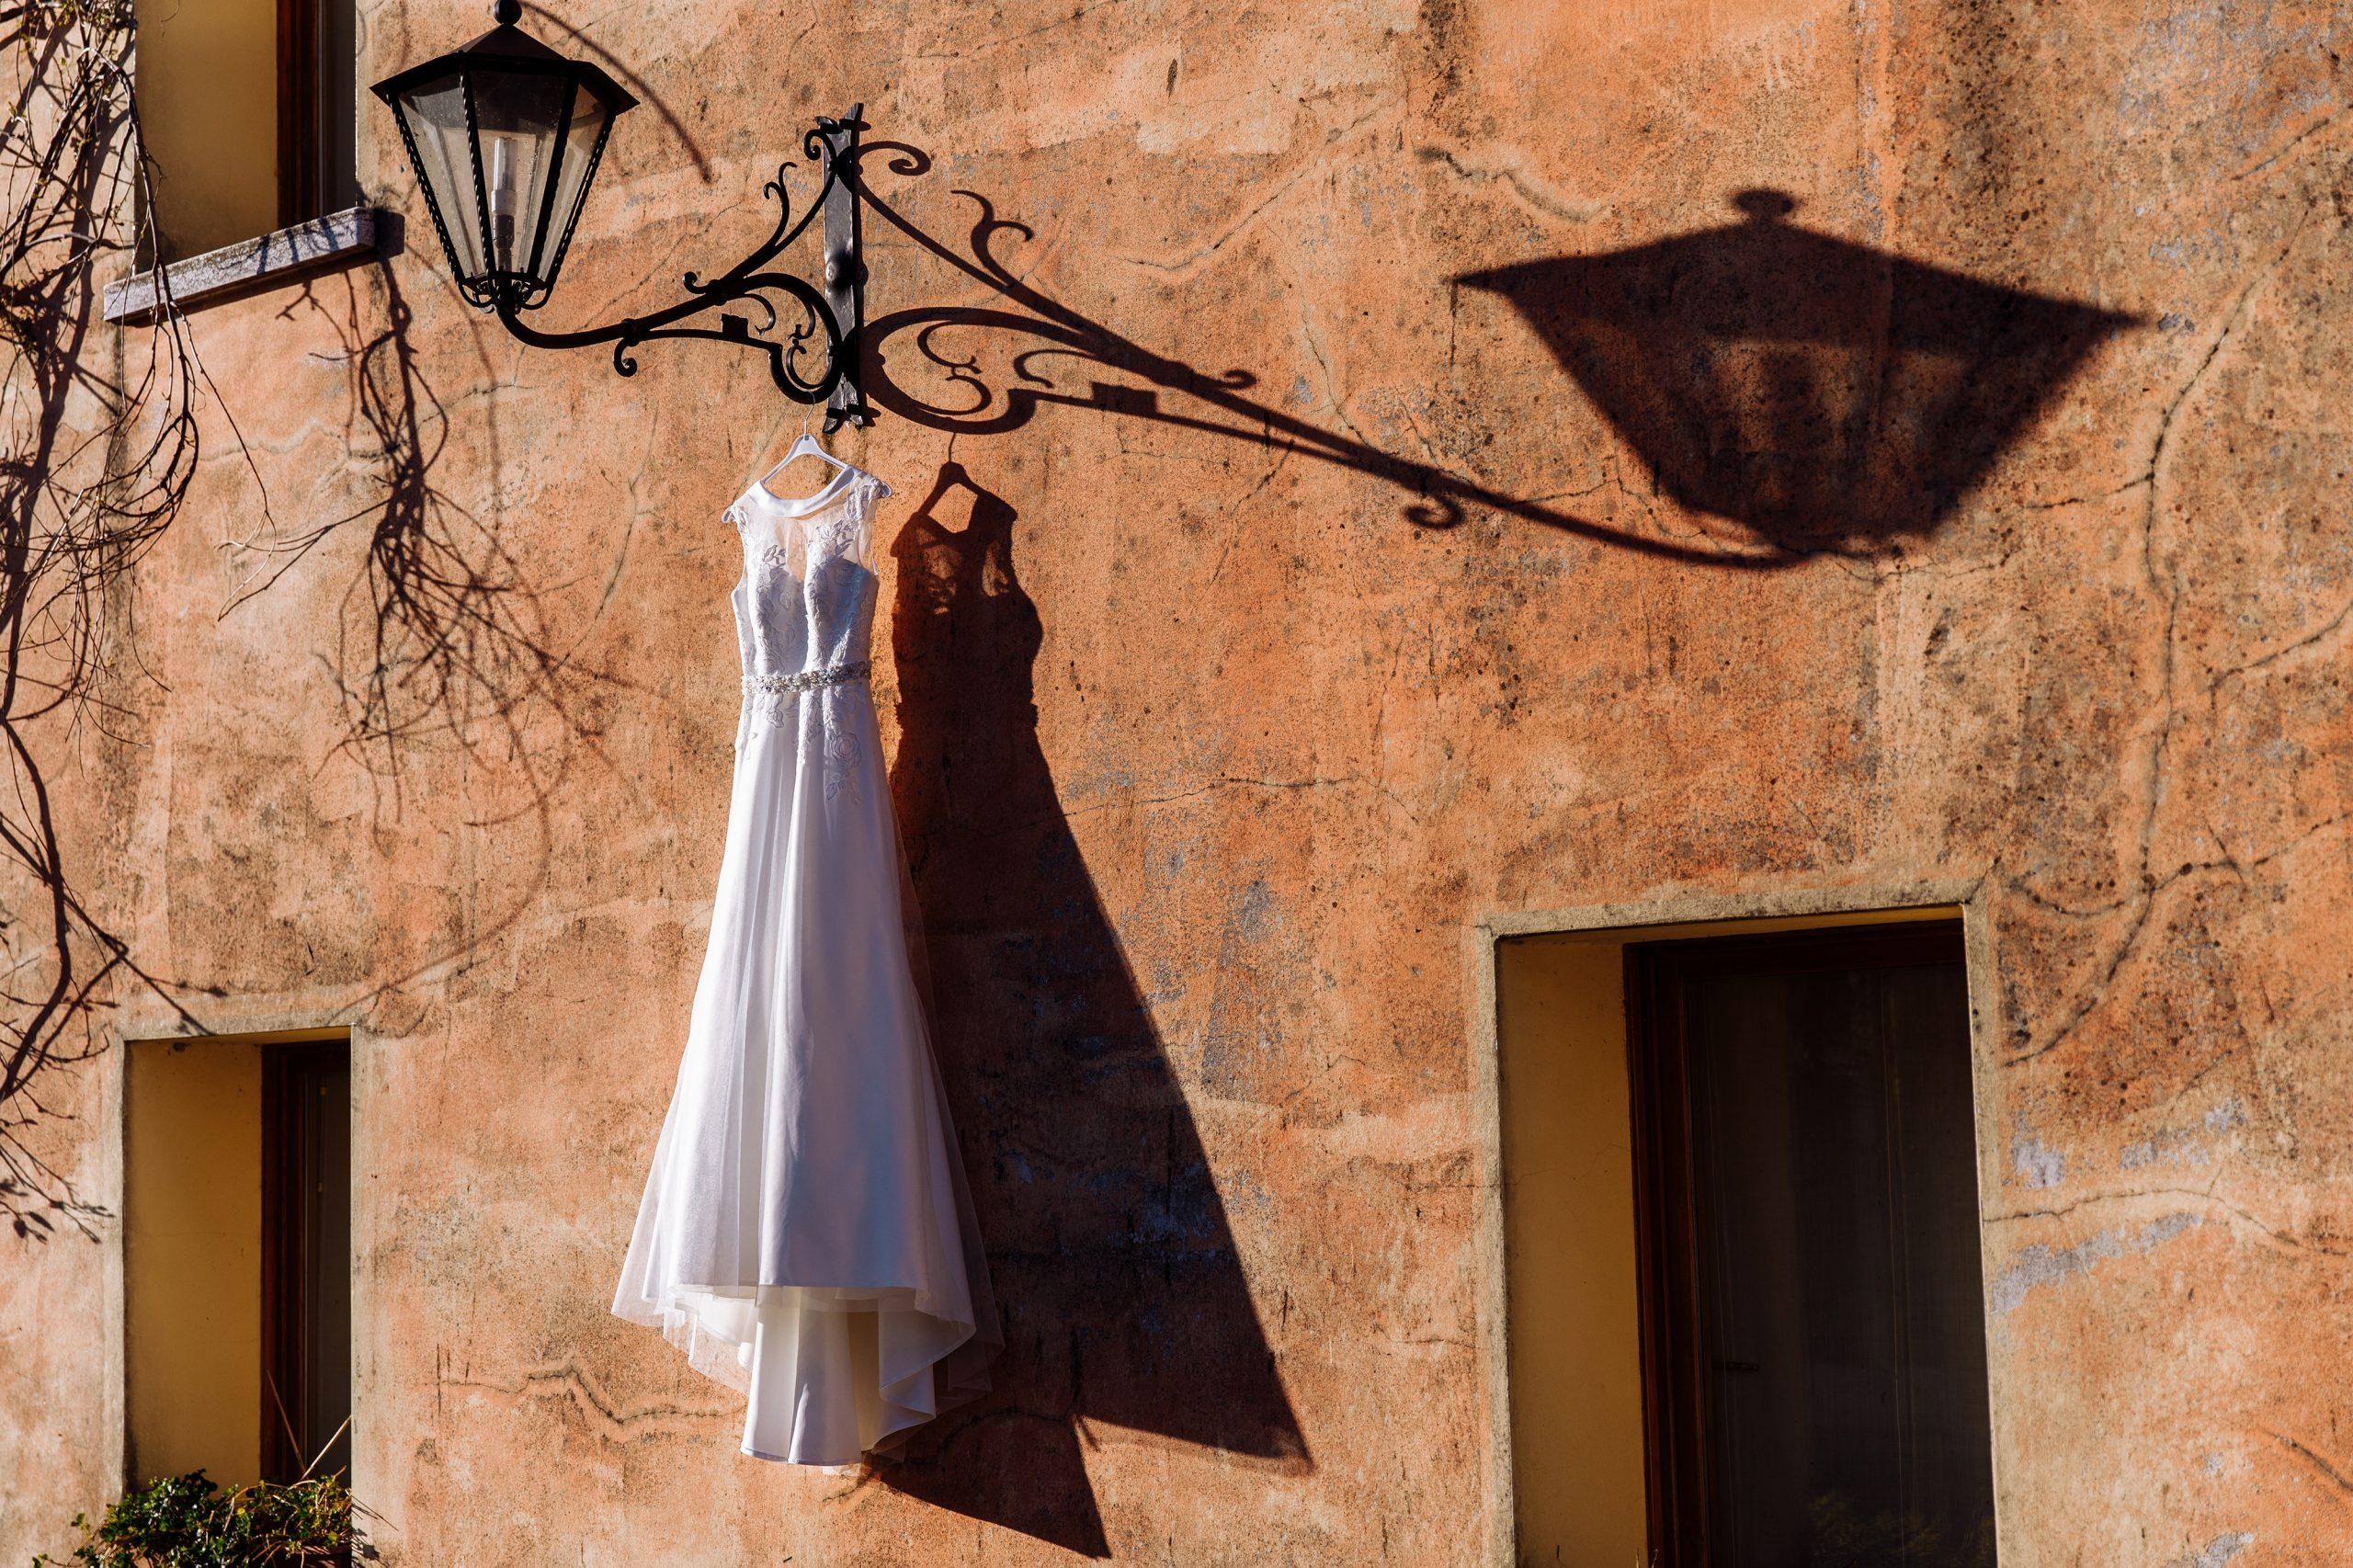
Go For Harsh Light to Get the Best of Shadow Effect in Your Photos
At times, documenting in harsh sunlight can actually offer dramatic results for amazing shadow photography. Typically, we would not recommend documenting photos when the sun is high in the sky. It can create undesirable results as it is usually too bright and creates strong contrasts. But when it comes to shadow photography, these two elements are precisely what you want to achieve.
Shooting in harsh light also works well whenever you are shooting architecture and other geometrical structures. The sharp shadows that the sun creates will add a dimension to their framework, which makes them look quite dramatic. So, walk around your area when the sun is high up in the sky. You will be able to see how beautifully it interacts with the buildings around you. It won’t take long before you see shadows casting all sorts of unique patterns that look pleasing to the eyes.
Just remember to avoid taking photos at noon. The sun will be directly above you, creating an unappealing shadow. Aim for taking pictures before or after 12 PM when the sun is at an angle (10 AM or 3 PM are often ideal times).
Get Playful With Shapes To Create Fun Shadows
While photographing shadows, make sure you are conscious of how they appear in your image. Are they easily recognizable? If they look distracting, you should leave them out of your frame.
The only secret is to make sure that an object does not cast a shadow that looks like an indistinguishable lump or something strange. The best shadows often feature beautiful patterns or solid contours in professional portraits.
Just look for objects that have distinctive silhouettes. You can try just about anything from bicycles to trees, as long as they are easy to identify. If you are up for some human portraits, humans do make nice shadows, especially when their arms and legs are spread apart.
Known How Chiaroscuro Can Help & Elevate Your Shadow Photography
Learning how light in photography works and effects shadow can help you get creative with your professional shots. And that is why it is crucial to understand Chiaroscuro. Chiaroscuro is a concept in painting and photography that describes the perfect contrast between light and dark.
To understand the relationship between light and dark, it is best if you look at some examples to get a better visual. Some of the most famous paintings that feature Chiaroscuro’s effect include Vermeer’s Milkmaid and Joseph Wright of Derby’s The Orrery. But, when it comes to photography, some of Robert Maplethorpe’s portraits and Edward Weston’s beautiful still lifes come to mind (almost every professional and experienced photographer can relate to them).
The best use of Chiaroscuro is highlighting detail while using light and leaving the less critical elements in the dark. The contrast produced by Chiaroscuro also adds a beautiful proportion to the subject and puts an excellent emphasis on textures.
In order to create some dramatic photography, you will need to use hard, directional lighting to bring out the best shadows. In other words, choose a light source that offers a focused beam that you can move at different angles in order to create various effects. In order to create interesting shadows, you should also consider shooting in dimly lit locations. Shine the source of your light onto your subject from various angles until you see interesting contrasts and textures. There is no right or wrong way of doing this. Start experimenting with your light and see the results you get when you are photographing.
Bring Rembrandt Light to Add Depth to Your Professional Shots
Now that you’re familiar with how chiaroscuro works, then it’s time to learn how to use it for different portrait lighting patterns. There are an endless number of techniques to try, but when it comes to shadow photography, the best ones are Rembrandt lighting and split lighting. Before we go ahead and tell you ways to use this lighting technique in order to create mesmerizing shadow portraits, first, let’s discuss what Rembrandt lighting is.
This technique is named after the famous Dutch painter who was also a chiaroscuro master. Rembrandt’s specific lighting style in his paintings inspired professional photographers to adapt it for their own use. To create Rembrandt lighting, position your light source about 45 degrees in front of your subject. Then just adjust it so that it is above your model’s head and pointing down at them at about 45 degrees.
Due to the light placement, half of your subject’s face will be in the dark, save for a small triangle-shaped light on the cheek. This will add so much character and drama to your professional portraits.
The next popular lighting pattern used for shadow photography is split lighting. It is defined by the light source illuminating one side of the face while the other half remains entirely in the shadows. To achieve this, place your key light directly beside your subject, and you will capture a beautifully shadowed face effect that your client will love.
Remember, there are additional lighting patterns to try out! Just play around with your lighting to find your favorite effects to capture.
Try Black and White Effect To Enhance the Shadows in Your Professional Portraits
Sometimes, colors can be distracting, especially when it comes to shadow photography. To make it effortless for your client to see the lovely shadows, you can turn your camera mode to shoot in black and white.
The black and white mode of photography increases the contrast between light and dark, resulting in great professional shadow portraits. Shades of white, grey, and black are easier for the eyes to interpret than a broad spectrum of colors. This is one of the reasons why millennial couples are choosing to include monochrome wedding portraits in their wedding portfolio.
One of the simplest ways to produce dramatic monochromatic photos is by switching your camera’s shooting mode to black and white. Another option to achieve this look is to convert your image to black and white in editing. All you have to do is to open your file on your favorite editing software and desaturate the image.
Now that you know how helpful shadows can be in influencing the mood of your professionally captured photographs try to incorporate them in your next shoot. Observe how light and darkness interact in your surroundings; you never know when you’ll find something unique!