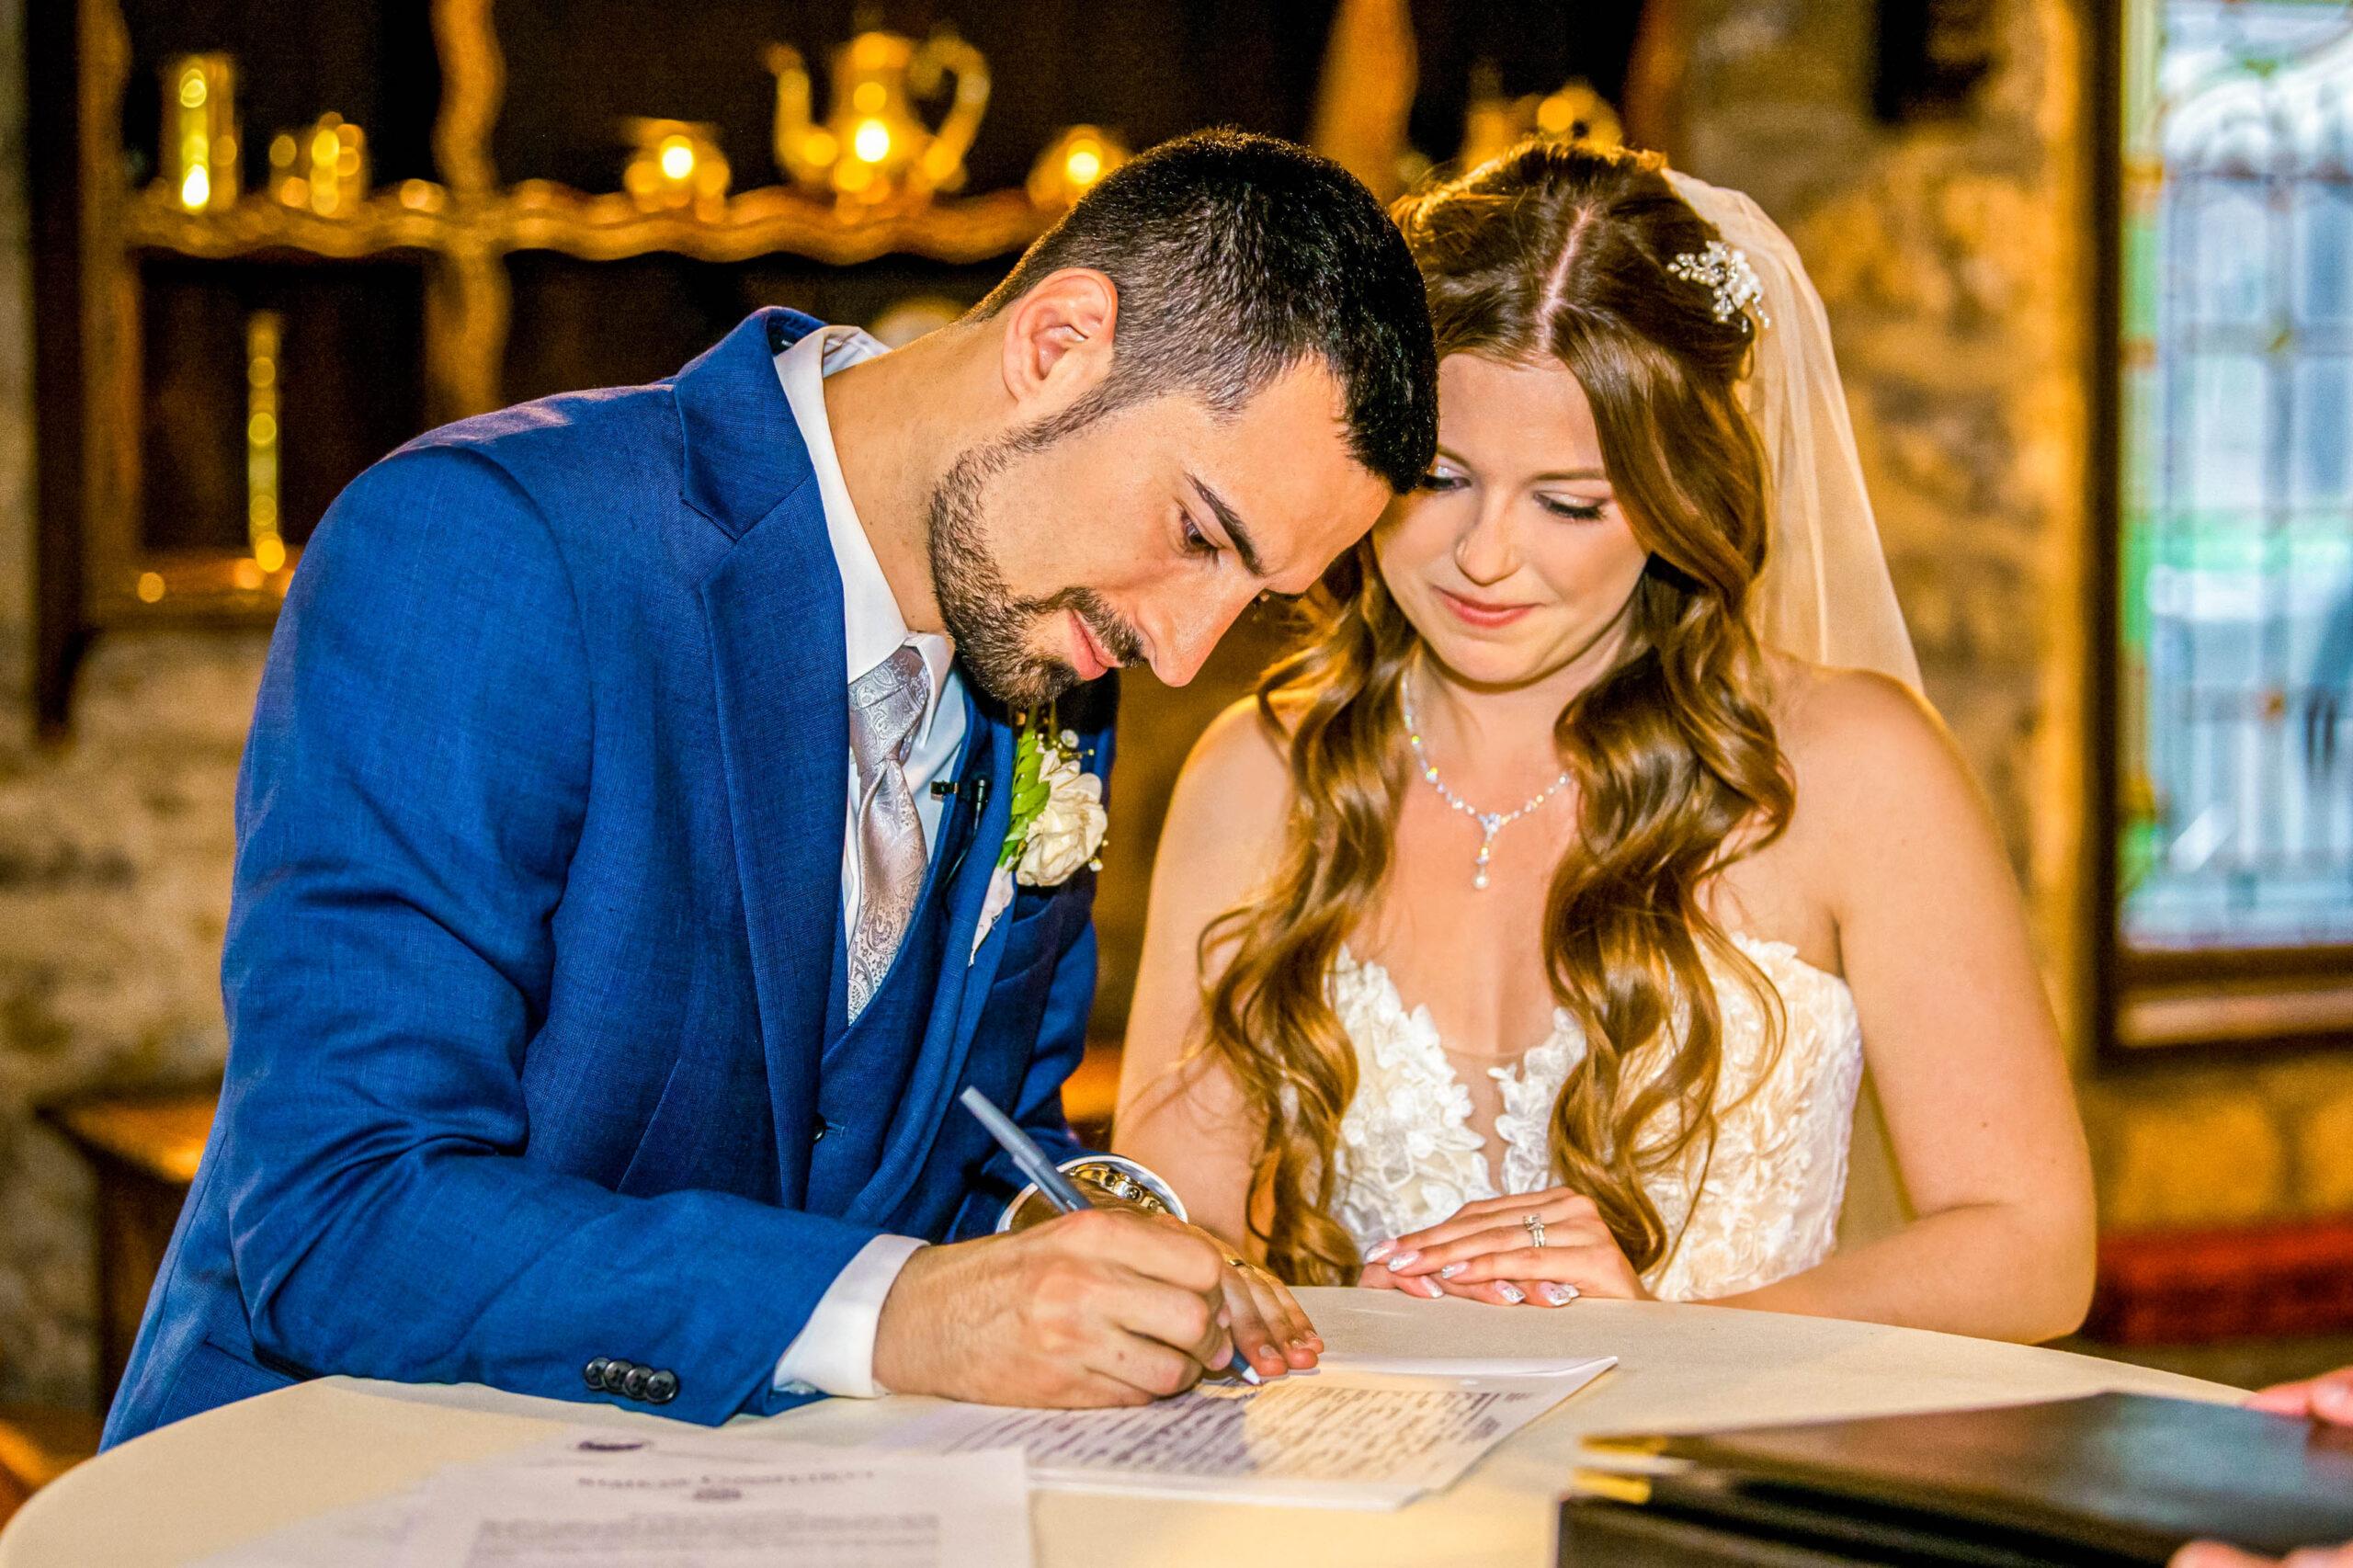
The vows have been spoken, the rings exchanged, and the first kiss shared. Cheers erupt from the guests, marking the joyous culmination of the ceremony. But before the celebration truly begins, there’s one final, pivotal moment that remains: the signing of the register.
While it may seem like a straightforward administrative task, this act holds immense significance—it’s the moment the marriage becomes legally binding. Yet, for photographers, capturing this scene can be surprisingly challenging. Often, the couple is seated at a table, backs turned to their guests, in a dimly lit corner of a church, registry office, or venue. The setting can feel uninspiring, and the angles awkward, making it easy to overlook the importance of this moment. However, as a wedding photographer, it’s your job to transform this legal formality into a beautifully documented memory.
Whether you’re an experienced photographer looking to refine your craft or a beginner preparing for your first wedding shoot, this guide is here to help. We’ll explore 25 essential tips to master the art of photographing the signing of the register, ensuring you capture this meaningful moment with creativity, elegance, and professionalism. Let’s turn this tricky task into a standout feature of your portfolio.
Preparation and Planning
Great signing photos don’t happen by chance—they’re the result of thoughtful preparation. Scout the venue, understand the lighting, and plan your angles in advance. Communicate with the couple and officiant to set expectations. Bring backup gear and props like a stylish pen. Being proactive ensures you’re ready to capture the moment flawlessly.
- Scout the Location Beforehand
Arrive early to assess the venue layout. Is the signing table in a poorly lit corner or backlit by a window? Knowing these details helps you prepare for potential challenges. If the table is against a wall, you’ll know your movement will be restricted, allowing you to plan your angles and lighting adjustments in advance.
- Talk to the Officiant
Officiants often have specific rules about photography during the signing. Some prohibit photos of the registry book for privacy reasons. Speak with them beforehand to understand their preferences. Ask, “Where can I stand? When can I shoot?” Respecting their guidelines ensures smooth collaboration and keeps you in good standing for future weddings.
- Coordinate with the Couple
Discuss the signing process during your pre-wedding consultation. Let the couple know it’s often a quick moment and encourage them to slow down. A simple tip like, “Pause and look at me before putting the pen down,” can make all the difference in capturing a perfect, composed shot of this important moment.
- Check the Pen Situation
A small detail like the pen can impact the elegance of your photos. Cheap plastic pens can look out of place in close-up shots. Suggest the couple bring a stylish pen or bring one yourself, like a high-quality fountain pen. This small touch adds sophistication and elevates the overall aesthetic of the images.
- Clear the Clutter
Registration tables often accumulate unnecessary items like tissues, water glasses, or handbags. Before the ceremony, politely ask to keep the table clear or discreetly declutter it yourself. A clean, organized table ensures the focus remains on the couple and the moment, resulting in more polished and professional-looking photos.
Lighting the Scene
Lighting can be a major challenge during the signing. Churches are often dimly lit, while registry offices may have harsh fluorescent lighting. Use off-camera flash to bounce light for a softer effect or position the couple near a window for natural light. Adjust your settings to balance exposure and ensure the couple is beautifully lit.
- Master Off-Camera Flash
In dimly lit corners, on-camera flash can produce harsh, unflattering light. Instead, use an off-camera flash on a stand, aimed at the ceiling or a white wall to bounce light. This technique creates soft, natural-looking illumination that mimics window light, adding depth and dimension to your photos while avoiding flat, harsh shadows.
- Look for Natural Light Sources
If you can influence the table’s placement, opt for open shade or position it near a window. Natural light is the most flattering for skin tones and enhances the day’s ambiance. For outdoor weddings, this simple adjustment can make a significant difference in the quality and warmth of your photos.
- Watch for Mixed Lighting
Mixed lighting, like tungsten overhead lights and daylight from a window, can create odd color casts on the couple’s faces. To avoid this, overpower ambient light with your flash or position yourself to favor one dominant light source. This ensures consistent white balance and more natural-looking skin tones.
- Avoid Direct Sun
Direct sunlight at outdoor ceremonies can cause harsh shadows and bright hotspots, especially on white dresses. Dappled sunlight is even worse, creating uneven lighting. Always aim for open shade, which provides soft, even light and avoids unflattering shadows, ensuring the couple looks their best in every shot.
- Use a High ISO if Necessary
Don’t hesitate to increase your ISO in low-light situations. Modern cameras handle noise exceptionally well, and a slightly grainy but sharp photo is far better than a blurry, underexposed one. Pushing your ISO above 1600 can help you capture well-lit, crisp images without sacrificing quality or missing key moments.
Composition and Angles
Even with limited movement during the signing, your composition doesn’t have to be dull. Experiment with creative angles—shoot from slightly above, capture reflections, or frame the couple through surrounding elements like chairs or flowers. Use depth of field to blur distractions and focus on the couple. Small adjustments can make your shots dynamic and engaging.
- Get Low
Shooting from a lower angle can make the couple appear more majestic and eliminate distracting backgrounds. If they’re seated, kneel to their eye level for a more intimate connection in the photo. This perspective adds variety to your shots and creates a unique, engaging composition that stands out from standard eye-level photography.
- The “Fake” Signing Shot
Since photographing the actual legal document is often prohibited, stage a “fake” signing after the real one. Ask the couple to hold the pen and either look at the camera or at each other. This allows you to control the pose, lighting, and composition, ensuring you capture a polished, worry-free shot for the album.
- Capture the Details
Don’t just focus on faces—zoom in on the details like the hands holding the pen, the rings on their fingers, or the document itself. These detail shots add depth and variety to the album, helping to tell the full story of the moment. They also provide a more artistic and intimate perspective of the signing.
- Include the Witnesses
The signing is a shared moment, often involving parents or close friends as witnesses. Capture their expressions as they sign—these are often filled with pride and emotion. Step back for a wide shot that includes the couple and their witnesses gathered around the table, creating a complete and heartfelt scene.
- The “Over the Shoulder” Shot
Position yourself behind or to the side of the couple for an over-the-shoulder perspective. This angle captures what they see—the document, their hands, and the significance of the moment. It adds a storytelling element to your photos, emphasizing the gravity of their commitment and creating a unique, memorable composition.
Managing the Couple and Guests
As the director of this moment, gentle guidance is key. Politely instruct the couple to pause, look up, or adjust their pose for the best shot. Communicate confidently with guests, ensuring they don’t block your view. A calm, professional approach helps everyone feel at ease and ensures you capture the perfect images.
- “Chin Up, Pen Down”
When people write, they naturally look down, which often results in photos of the tops of their heads or unflattering angles. Use the cue “Chin up, pen down” to guide them. Ask them to hold the pen on the paper but look at you or each other, ensuring you capture their eyes and joyful expressions.
- Watch for the “Floating Hand”
During staged signing shots, people sometimes hold the pen awkwardly in mid-air. This can make the photo look unnatural. Remind them to rest their hand naturally on the paper, as if they’re genuinely writing. This small adjustment makes the pose look authentic and ensures the final image feels more genuine and polished.
- Manage the Paparazzi
Guests often rush forward with smartphones during the signing, blocking your view. Politely establish your position first by saying, “I’ll grab the official shots quickly, then you’re welcome to come up.” Most guests will respect this if you’re confident and courteous, allowing you to capture the key moments without interference.
- Capture the Candid Moments
Look for unscripted moments between the posing and signing. A whispered joke between the couple, a proud parent’s smile, or a sigh of relief after the ceremony. These candid shots often carry the most emotion and become the couple’s favorites, adding depth and authenticity to the story of their special day.
- Don’t Forget the Dress
If the bride is seated, her dress might be bunched or hidden under the table. Take a moment to fluff the dress or arrange the train so it’s visible in the shot. This small effort ensures the gown looks elegant and adds a touch of sophistication to the final images.
Technical Considerations
The right gear can make or break your signing photos. Use a fast lens with a wide aperture for low-light settings and a shallow depth of field. Bring a reliable off-camera flash for soft, balanced lighting. Ensure your camera settings—ISO, shutter speed, and white balance—are optimized. Backup equipment is essential to avoid any technical hiccups.
- Use a Fast Lens
A prime lens with a wide aperture, like f/1.4 or f/1.8, is perfect for low-light venues. It lets in more light, ensuring brighter images in dim settings. Additionally, the shallow depth of field blurs distracting backgrounds, such as fire extinguishers or curtains, keeping the focus solely on the couple and enhancing the overall composition.
- Silent Shutter Mode
In quiet venues like churches or registry offices, the loud “clack” of a DSLR shutter can disrupt the atmosphere. If you’re using a mirrorless camera, switch to silent shutter mode. This ensures you remain discreet, preserving the sacredness of the moment and helping the couple feel more at ease during their ceremony.
- Check Your White Balance
Registry offices often have unflattering wall colors, like yellow or green, which can confuse Auto White Balance settings. To avoid unnatural skin tones, set a custom white balance or shoot in RAW. This allows for easy adjustments during post-production, ensuring the couple’s skin tones look natural and flattering in the final images.
- Shoot in Burst Mode
People blink or make awkward expressions at the wrong moment. Shooting in short bursts of 3-4 frames increases your chances of capturing the perfect shot. This technique ensures you’ll have at least one frame where everyone’s eyes are open, and their expressions are natural, making your final selection much easier.
- Backup Your Angles
Don’t stick to one position. If you have a second shooter, assign them a different perspective. If you’re working solo, move quickly and quietly to capture wide, medium, and close-up shots. This variety ensures a well-rounded gallery, giving the couple a comprehensive collection of their special day.
The signing of the register may only last a few minutes, but it represents a profound window of time with immense significance. This moment is not just paperwork; it is the definitive legal transition that shifts a couple from being engaged to officially married. While photographers often face logistical nightmares during this phase—ranging from terrible lighting conditions and cramped corners to strict officiating rules—it remains a unique pocket of quiet intimacy. Amidst the whirlwind energy and public spectacle of a wedding day, this is often the first time the couple sits together as partners in a calm, reflective space.
By preparing diligently ahead of time, mastering your technical approach to lighting, and offering gentle, unobtrusive direction, you can transform what might seem like a mundane administrative task into a stunning piece of art. Remember that these tips serve as tools to guide you, not rigid rules that confine you. Every ceremony is distinct, so maintaining the flexibility to adapt is crucial. With practice and patience, you won’t just endure this part of the day; you will find yourself eagerly anticipating the signing as a valuable opportunity to create something deeply special and timeless for your clients.